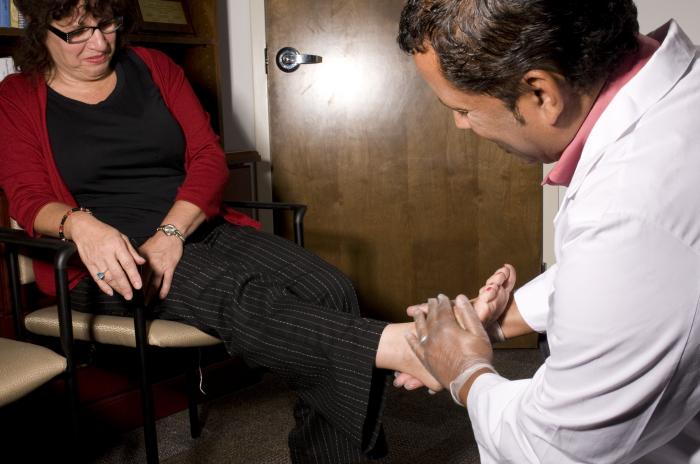
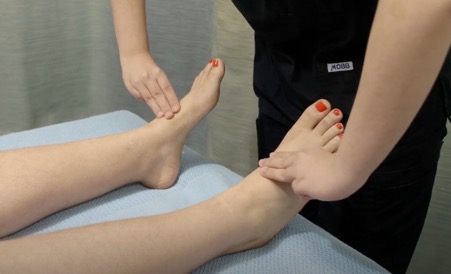
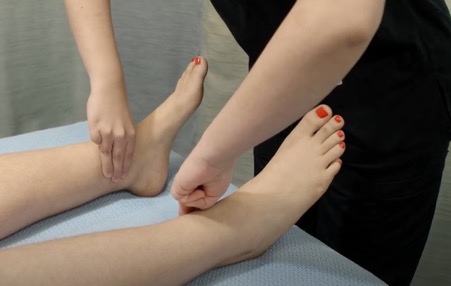
From patient selection to clinical application, documentation and follow-up.
Trusted Care. Inspired Innovation.
2–3 hoursClinical competency
Core message
Advanced therapy works best when the basics are excellent.
Assess the patient. Treat the cause. Prepare the wound. Apply only when indicated. Measure objectively.
Assess
→
Prepare
→
Apply
→
Review
Section 00
How to run this workshop
Recommended format: a 2.5-hour master class that can expand to 3 hours or compress to 2 hours.
0–10
Opening + pre-test
Baseline knowledge and clinical framing.
10–55
Wound science + assessment
Why wounds fail and how to assess safely.
55–95
Wound-bed preparation + bioprotein science
TIME, aetiology-specific care and product positioning.
95–105
Break
Reset before practical modules.
105–150
Selection + demonstration + hands-on
Algorithm, simulated application and competency checklist.
Trainer setup
Projector and internet-free deck backup
Wound photos or printed case cards
Simulated wound model
Demo vial/syringe/saline/needle pack
Procedure checklist and documentation form
Latest manufacturer IFU / Klinik SOP
Section 00
Learning outcomes
Clinical judgement
Identify wound aetiology, red flags and suitability for adjunctive therapy.
Practical technique
Prepare the wound, reconstitute product safely and demonstrate simulated application.
Governance
Document objectively, follow up consistently and know when to escalate.
By the end, doctors should know when to use bioprotein — and just as importantly, when not to use it.
Opening activity
Pre-test discussion
Ask the room
What is the commonest reason a chronic wound fails to heal?
Which wound should not receive advanced adjunctive therapy today?
How do you measure treatment response objectively?
Trainer prompt
Capture answers without correcting immediately. Return to these questions during the final recap.
Suggested tool: Mentimeter, show of hands, or printed MCQ sheet.
01 — Why wounds fail to heal
A chronic wound is usually a symptom of an unresolved problem.
The wound surface is where we see the failure. The cause may be pressure, ischaemia, venous hypertension, infection, diabetes, nutrition, repeated trauma — or several of these at once.
Teaching principle: do not start with “which dressing?” Start with “why is this wound still open?”
01
Normal wound healing: four overlapping phases
Hemostasis
Clot formation, platelet activation and early signalling.
Inflammation
Cell recruitment, bacterial control and debris clearance.
Proliferation
Granulation, angiogenesis, collagen deposition and epithelial movement.
Remodelling
Matrix maturation, tensile strength and scar evolution.
01
The chronic wound loop
Underlying cause
→
Inflammation
→
Tissue breakdown
→
Bioburden / exudate
→
Edge fails to advance
Adding an advanced product without breaking this loop may produce poor results and poor clinical confidence.
01
Factors delaying healing
Local barriers
Necrotic tissue / slough
High bioburden or infection
Pressure and shear
Foreign body
Excess exudate or desiccation
Undermining / dead space
Repeated trauma
Patient/system barriers
Diabetes and hyperglycaemia
Peripheral arterial disease
Venous hypertension/oedema
Malnutrition or anaemia
Smoking
Renal disease / frailty
Immunosuppression
01
Clinical rule: treat the cause first
Weak approach
“This wound is chronic. Let’s apply the advanced product.”
VS
Strong approach
“What is the wound aetiology, what is delaying healing, and is the wound ready for adjunctive therapy?”
The product is not the plan. The plan is the plan.
02 — Structured wound assessment
Assess the patient before you assess the wound.
A beautiful dressing on the wrong diagnosis is still the wrong treatment.
Do not let an advanced product delay vascular escalation.
ABI may be unreliable in diabetes because of calcified vessels. If available, toe pressure/TBI can be helpful, especially when the clinical picture and ABI do not match.
02
Documentation baseline
Parameter
Minimum standard
Why it matters
Size
Length × width × depth in cm
Allows objective response tracking
Tissue
% granulation, slough, necrosis
Shows wound-bed trajectory
Exudate
Low / moderate / heavy
Guides dressing choice
Edge/periwound
Maceration, callus, undermining
Identifies barriers
Photo
Consent + consistent angle/distance
Clinical review and audit
03 — Wound-bed preparation
Prepare the wound before applying advanced therapy.
Bioprotein should be considered only after basic barriers are assessed and managed: non-viable tissue, infection/inflammation, moisture imbalance and non-advancing edges.
03
TIME framework
T — Tissue
Remove or reduce non-viable tissue so the wound bed can be assessed and treated accurately.
I — Infection / inflammation
Control bacterial burden and inflammatory drivers before expecting a biological adjunct to perform well.
M — Moisture
Choose dressings that absorb when needed, but avoid desiccation or periwound maceration.
E — Edge
If the edge is not advancing, revisit aetiology, pressure, perfusion, infection and patient factors.
TIME is a systematic wound-bed preparation approach described in wound-care literature.
03
Debridement: purpose and caution
Why debride?
Remove necrotic burden
Reduce slough and debris
Expose viable wound bed
Enable accurate assessment
Improve dressing contact
Pause first when
Dry stable ischaemic eschar
Critical limb ischaemia suspected
Uncontrolled bleeding risk
Severe pain out of proportion
Need surgical/vascular input
03
Dressing choice: match the wound need
Wound feature
Dressing direction
Avoid
Heavy exudate
Absorptive secondary dressing
Occlusion that worsens maceration
Dry wound bed
Moisture donation/retention
Further drying
Fragile periwound
Skin protection and atraumatic fixation
Repeated adhesive trauma
Dead space
Appropriate packing without overpacking
Superficial cover only
Pressure-related
Pressure redistribution/offloading
Dressing-only strategy
03
Aetiology-specific essentials
DFU
Offloading, callus care, infection assessment, vascular assessment and glycaemic optimisation.
VLU
Compression pathway after arterial assessment, oedema control and skin care.
Arterial
Perfusion assessment and vascular referral; avoid delaying limb-salvage decisions.
Advanced therapy is layered on top of aetiology-specific care — not substituted for it.
04 — Bioprotein science & Cellmax™ positioning
Bioprotein is best taught as a biological signal support — not a miracle wound closure promise.
The scientific story should be mechanistic, cautious and clinically governed.
04
What do we mean by “bioprotein”?
Concept
A cell-free mixture of bioactive signalling molecules intended to support tissue-repair processes.
Avoid overclaiming. Mechanistic plausibility does not guarantee an individual clinical result.
04
Proposed biological roles in wound repair
How to explain it
Bioprotein is best framed as biological signal support that may improve the wound-healing environment.
What not to say
Avoid teaching it as a guaranteed wound-closure shortcut or a replacement for wound fundamentals.
Teach the mechanism as “supporting the healing environment”, not “forcing the wound to heal”.
04
Cellmax™ regulatory anchor
MDA
Cellmax™ Freeze Dried Powder
MDA Registration No: GD8996426-239437
Clinical framing: healthcare-professional use as an adjunct to standard wound care for selected adult chronic/non-healing wounds within the registered intended purpose.
Training implication: use current MDA registration, latest IFU and Klinik Inocare SOP as controlling references.
04
What Cellmax™ is not
Not first-line alone
It does not replace wound-bed preparation, offloading, compression, antibiotics when indicated or vascular care.
Not for every wound
Patient selection matters. Some wounds need urgent referral or cause correction first.
Not a guarantee
Response must be monitored objectively. Non-response requires reassessment.
04
Product-specific IFU caution
Do not invent dosing, injection-point count or volume-per-area during training. These must come from the current manufacturer IFU / approved Klinik SOP.
From public manufacturer material
Published Cellmax information describes reconstitution of a freeze-dried 2 mL vial with 2 mL sodium chloride and subcutaneous application by trained medical personnel.
For final live training
Insert the latest authorised table for wound area, application volume and injection distribution from the current IFU.
05 — Patient selection
The best outcome starts with the right wound, at the right time, in the right patient.
A simple algorithm helps doctors decide whether to proceed, optimise first or refer.
05
Selection algorithm
Start
Chronic / non-healing wound
→
Step 1
Identify wound aetiology
→
Urgent red flags?
Yes
→
Do not proceed routinely
Treat, stabilise or refer first
No
→
Step 2
Prepare wound bed (TIME)
→
Cause addressed well enough?
→
Step 3
Check IFU indication + consent
→
Proceed
Apply + document + review
If any safety gate fails, do not proceed as routine. Optimise, treat or refer first.
05
Proceed only when the basics are addressed
Favourable profile
Chronic/non-healing wound within intended use
Cause identified
No uncontrolled infection
Perfusion acceptable or assessed
Pressure/oedema addressed
Wound bed prepared
Follow-up feasible
Delay or refer
Critical ischaemia/gangrene
Spreading infection/sepsis
Suspected deep abscess
Possible osteomyelitis needing workup
Uncorrected pressure/offloading failure
Unclear diagnosis or atypical wound
05
Consent conversation
Suggested explanation to patient
“This treatment is an additional therapy used together with standard wound care. We still need to control infection, pressure, blood flow, sugar level and dressing care. We will measure and photograph the wound so we can see whether it is responding.”
Explain
Purpose, steps, expected review schedule.
Disclose
Uncertainty, alternatives, cost, possible discomfort/risks.
Document
Consent, wound baseline, product batch and plan.
06 — Practical application workflow
Standardise the procedure from room setup to follow-up.
Variation in preparation, application and documentation makes outcomes difficult to interpret.
06
Procedure room setup
Aseptic field
Clean trolley, PPE, sterile consumables, sharps container and waste disposal.
Wound kit
Normal saline, gauze, debridement tools if appropriate, ruler, camera, dressing set.
Product kit
Cellmax vial, sodium chloride for reconstitution, syringe/needle, batch documentation.
06
Step 1: confirm before opening product
Patient check
Identity
Consent
Allergy/precaution review
Indication confirmed
Red flags excluded
Product check
Correct product
Package integrity
Expiry date
Storage condition
Batch/lot number recorded
06
Step 2: prepare the wound
Remove dressing
→
Cleanse
→
Assess
→
Debride if appropriate
→
Re-measure + photo
Do not proceed blindly. The wound may have changed since the last review.
06
Step 3: reconstitute according to IFU
Teaching sequence
Maintain aseptic technique.
Reconstitute using the authorised diluent/volume.
Inspect solution before use.
Use within the IFU/SOP-defined conditions.
Current public note
Public Cellmax material describes a freeze-dried 2 mL vial mixed with 2 mL sodium chloride, producing a clear liquid without sediment.
06
Step 4: application planning
Map the wound first
Identify the true wound edge, wound base, fragile structures, pain-sensitive areas and any undermining before planning application.
Use the authorised table
Application volume, spacing and number of points must follow the latest IFU / Klinik SOP.
Think beyond the product
After application, your dressing strategy and cause-specific care still determine what happens over the next days and weeks.
Public Cellmax material describes subcutaneous application at/near the wound edge and wound base/floor by trained medical personnel. Use the latest IFU for the live procedural demonstration.
06
Step 5: secondary dressing
Protect
Protect the treated wound bed and fragile periwound.
Balance
Choose dressing based on exudate, depth and tissue type.
Support cause care
Continue offloading, compression pathway or pressure redistribution where indicated.
Application is one procedural moment. Healing depends on everything that happens afterwards.
Advanced wound therapy should be clinically disciplined, not product driven.
Appendix
Optional: 2-hour compressed agenda
Time
Content
Method
0–10
Opening + objectives + pre-test
Interactive
10–35
Wound healing failure + assessment
Lecture
35–60
Wound-bed preparation + red flags
Lecture/cases
60–80
Bioprotein science + Cellmax positioning
Lecture
80–105
Patient selection + practical workflow
Algorithm/demo
105–120
Case challenge + post-test
Discussion
Appendix
Case-photo insertion guide
Recommended image set per case
1 overview wound photo
1 close-up wound photo with scale/ruler
1 supporting image if relevant: offloading device, compression, X-ray, Doppler or follow-up photo
Consent and de-identification confirmed
Layout tip for Reveal.js
Keep one hero image large, and place supporting images as small thumbnails. Use the same crop ratio across cases so the deck looks consistent.
Because the current deck uses placeholder blocks, you can swap each placeholder with a local img tag later without redesigning the slide.
Appendix
GitHub Pages presenter tips
Keyboard
F fullscreen S speaker notes Esc overview B black screen
M menu T chalkboard C draw on slide
Use the bottom-left Menu button for tools, slide search and all shortcuts.
Print to PDF
Add ?print-pdf to the URL, then use the browser print dialog.
References
Core references used to prepare this deck
Malaysia Medical Device Authority, Malaysia Medical Device Register — Cellmax™ Freeze Dried Powder entry and public register search. https://mdar.mda.gov.my/
Cellmax™ official product information: “What is Cellmax” and preparation/application notes. https://cellmax.com.my/what-is-cellmax/
International Working Group on the Diabetic Foot. IWGDF Guidelines 2023 update. https://iwgdfguidelines.org/guidelines-2023/
IWGDF/IDSA Guidelines on the diagnosis and treatment of diabetes-related foot infections, 2023 update. https://www.idsociety.org/practice-guideline/diabetic-foot-infections/
Harries RL et al. Wound bed preparation: TIME for an update. International Wound Journal. 2016. https://pmc.ncbi.nlm.nih.gov/articles/PMC7949772/
Sibbald RG et al. Best Practice Recommendations for Preparing the Wound Bed: Update 2006. Wound Care Canada. https://www.woundscanada.ca/
Final clinical-use version should be checked against the latest manufacturer IFU, authorised training manual and Klinik Inocare SOP before delivery.